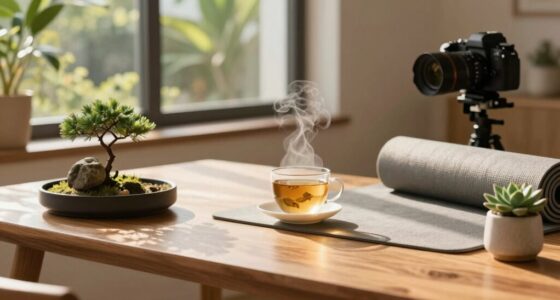

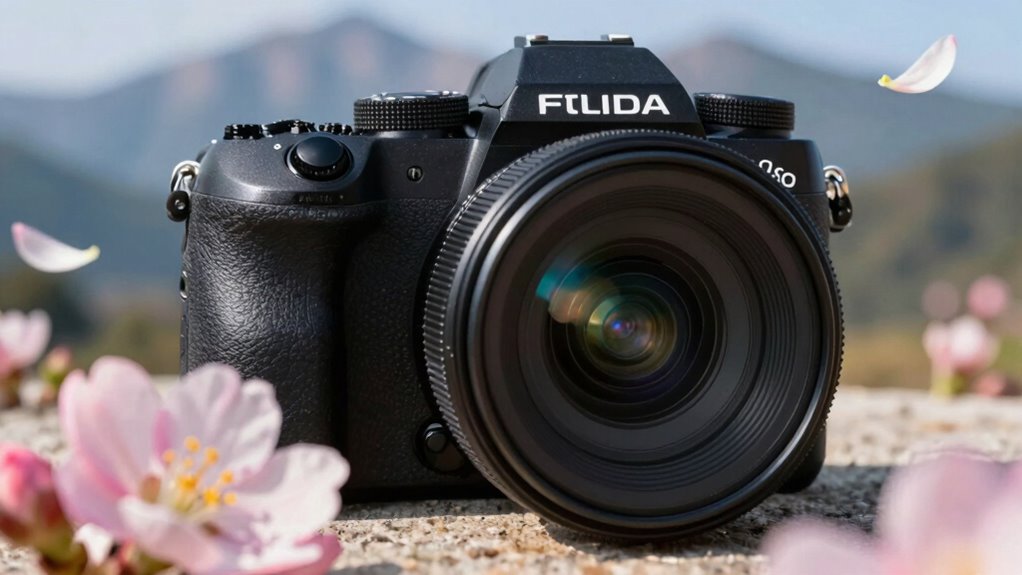
Shooting on auto mode limits your control and creativity, making it harder to capture truly professional photos. To stop shooting like it’s 2010, switch your mirrorless camera to manual mode and learn to adjust aperture, shutter speed, and ISO yourself. Practice changing these settings in different scenes to understand their impact. Mastering manual controls open your camera’s full potential and produces better images in various lighting conditions. Keep exploring, and you’ll discover how much your photos can improve.
Key Takeaways
- Switch your mirrorless camera to manual (M) mode for full control over exposure settings.
- Learn to adjust aperture, shutter speed, and ISO manually to craft intentional, professional images.
- Explore advanced features like focus peaking and exposure bracketing to enhance creative control.
- Regularly calibrate lenses and review images to ensure sharpness and optimal exposure.
- Practice experimenting with different scene settings to develop your skills beyond auto shooting.

Photography Manual Mode Cheat Sheet for DSLR Cameras and Mirrorless. Exposure Guide for ISO, Aperture and Shutter Speed for Taking Better Photos
𝐐𝐔𝐈𝐂𝐊 𝐒𝐎𝐋𝐔𝐓𝐈𝐎𝐍 𝐈𝐍 𝐀𝐍𝐘 𝐋𝐈𝐆𝐇𝐓𝐈𝐍𝐆 𝐒𝐈𝐓𝐔𝐀𝐓𝐈𝐎𝐍: This photography cheat sheet offers a quick visual reference for ISO, aperture…
As an affiliate, we earn on qualifying purchases.
As an affiliate, we earn on qualifying purchases.
Why Auto Mode Holds Back Your Creative Photography

Auto mode might seem like the easiest option, but it limits your ability to control key aspects of your photos. When you rely on camera automation, the camera makes decisions for you, which can result in images that lack personality and creativity. Auto mode adjusts settings for general scenes, but it doesn’t consider your unique artistic vision or the specific mood you want to convey. By depending solely on auto, you miss out on opportunities to experiment with composition, lighting, and focus. Handing over control means sacrificing potential for more striking, memorable shots. To truly develop your skills and express yourself creatively, it’s essential to move beyond auto mode and explore manual controls, where you’re the one guiding each shot. Embracing creative control can unlock new possibilities and help you craft images that stand out, especially when you understand how projector image quality depends on factors like contrast ratio and color accuracy. Gaining familiarity with manual settings empowers you to adapt quickly to different environments, ensuring your photos capture the intended atmosphere rather than relying on automated adjustments. Developing an understanding of camera sensor performance can further enhance your ability to optimize your settings for various lighting conditions. Remember, mastering these settings can also improve your overall photography skills, making your images more impactful and true to your artistic vision.
Mastering Aperture, Shutter Speed, ISO and Exposure: How They Interact and Affect Each Other
As an affiliate, we earn on qualifying purchases.
As an affiliate, we earn on qualifying purchases.
Mastering Key Manual Settings: Aperture, Shutter Speed, ISO
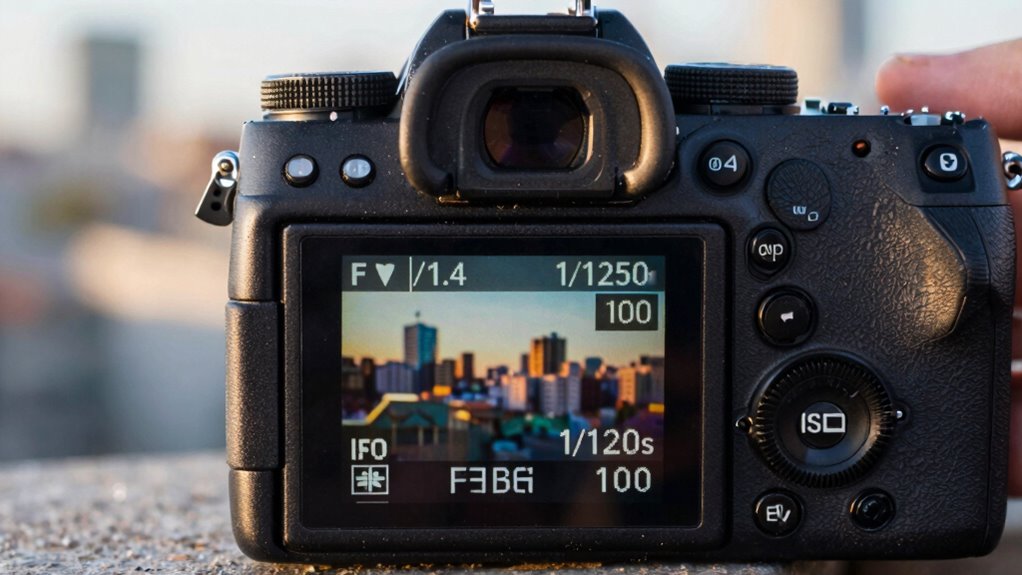
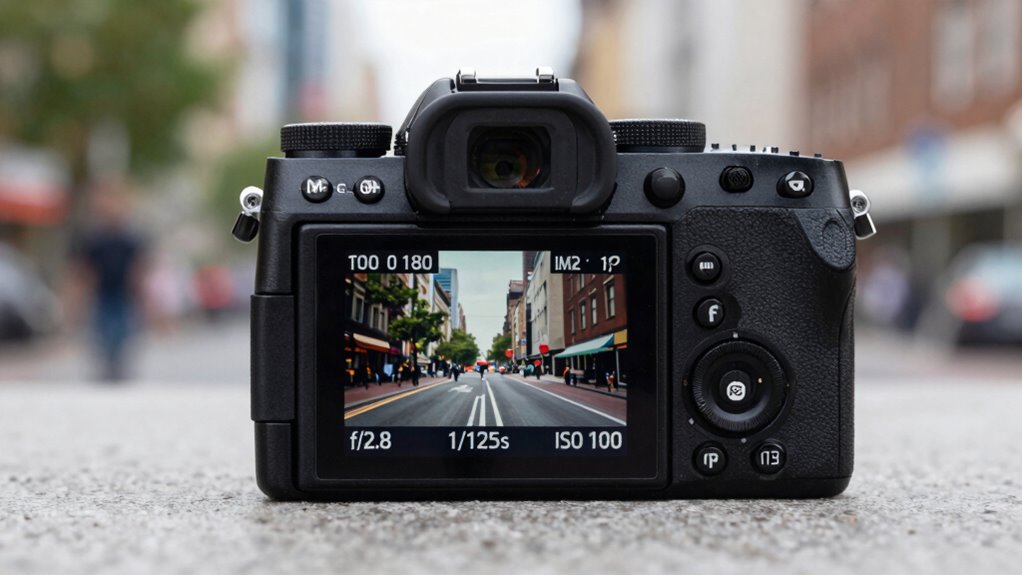
To access your camera’s full potential, it’s essential to understand and control three key settings: aperture, shutter speed, and ISO. These settings influence exposure and creative control. First, choose the right lens for your scene, considering focal length and aperture size. Second, adjust aperture to control depth of field: wider apertures (f/1.8) blur backgrounds, while narrower ones (f/16) keep more in focus. Third, set shutter speed to freeze motion or create motion blur, using a tripod when shooting long exposures. Fourth, fine-tune ISO to balance brightness with noise levels, especially in low light. Mastering these settings gives you the flexibility to capture sharp, well-exposed images, whether handheld or with a tripod, and open up your creative potential beyond auto mode.
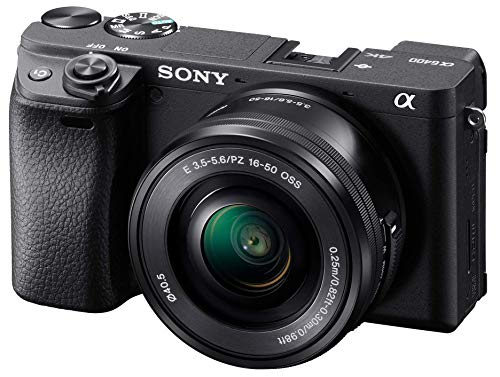
Sony Alpha a6400 Mirrorless Camera: Compact APS-C Interchangeable Lens Digital Camera with Real-Time Eye Auto Focus, 4K Video, Flip Screen & 16-50mm Lens – E Mount Compatible – ILCE-6400L/B, Black
20.1MP stacked back illuminated 1" Exmor RS CMOS sensor w/ DRAM, large aperture 24-70mm1 F1.8-2.8 ZEISS Vario-Sonnar T…
As an affiliate, we earn on qualifying purchases.
As an affiliate, we earn on qualifying purchases.
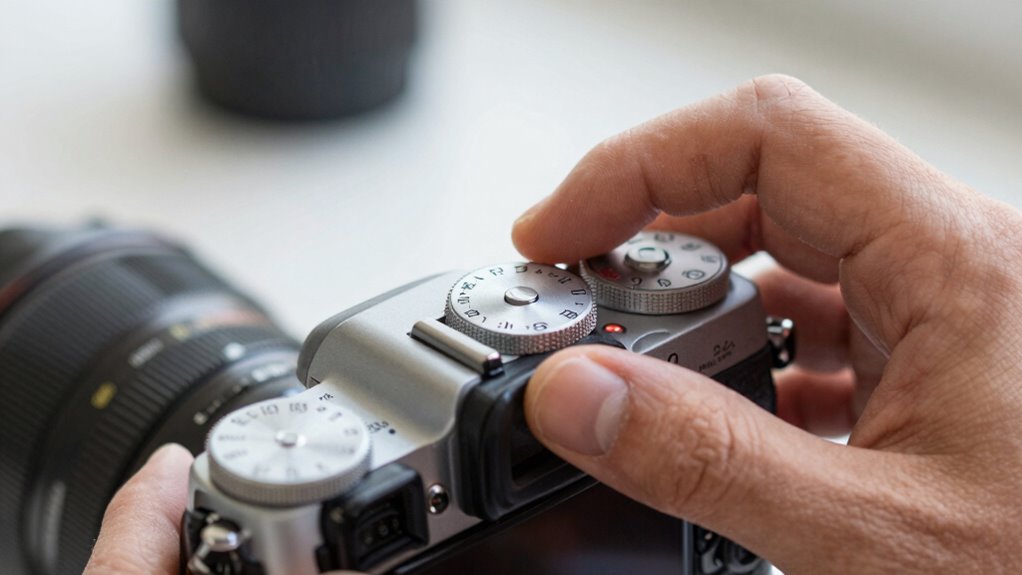
How to Switch From Auto to Manual in Easy Steps
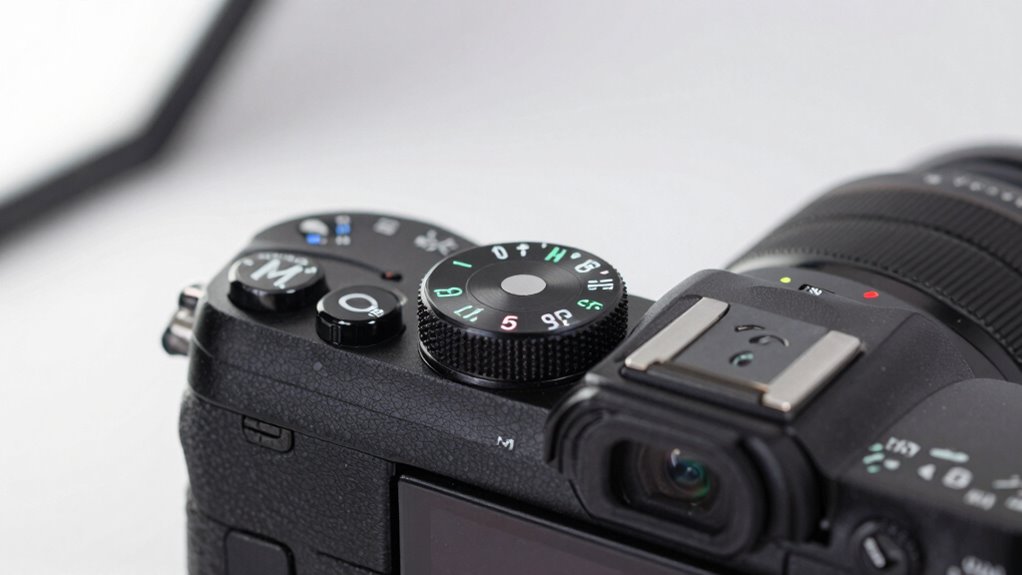
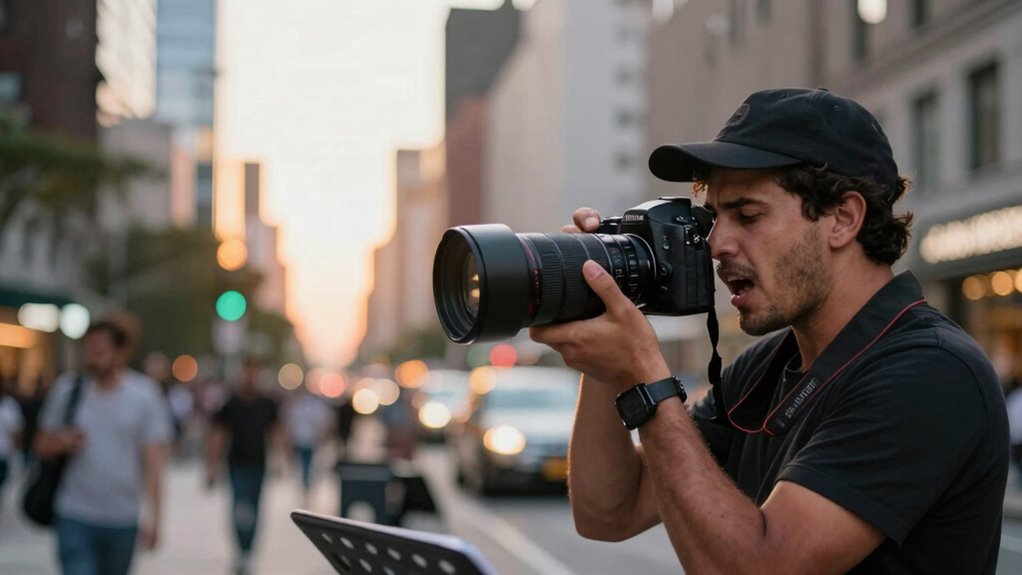
Switching your mirrorless camera from auto to manual mode is a straightforward process that puts you in control of your images. First, locate the mode dial or menu button and select “Manual” or “M” mode. This gives you full control over settings like aperture, shutter speed, and ISO. Before shooting, check your lens calibration to ensure sharp images, especially if you’re switching from auto focus. Also, keep an eye on your battery life, as manual mode often consumes more power with screen and sensor use. Once in manual mode, you can adjust settings precisely to match your creative vision. Practicing switching modes quickly can help you avoid missing shot opportunities, and remember that calibrating your lens periodically improves image quality. Additionally, understanding your camera’s field of view and imaging scale can help you better compose astrophotography shots. Being familiar with essential camera settings like ISO, aperture, and shutter speed allows for more intentional and creative control over your images. To optimize your experience, exploring camera menus and custom settings can streamline your workflow and help you adapt quickly to different shooting scenarios. Moreover, being aware of body piercing considerations, such as jewelry type and placement, can ensure comfort and safety during extended shooting sessions. Knowing how to quickly access and customize your camera controls can further enhance your shooting efficiency and confidence.

SLOW DOLPHIN Tripod Camera Clip Clamp Flash Reflector Holder Mount with 1/4 Inch Screw 360 Degree Swivel for Studio Backdrop Camera SLR, Digital SLR, Video Came(Black)
Mini-head can rotate 360 degrees,Can clamp on most light stands, tripods, pipes or board to mount photographic equipments.
As an affiliate, we earn on qualifying purchases.
As an affiliate, we earn on qualifying purchases.
Practice Tips for Perfecting Aperture, Shutter Speed, and ISO
Practicing how to adjust aperture, shutter speed, and ISO hands-on is the best way to master your mirrorless camera. Start by setting a scene and experimenting with each setting individually, observing how they influence exposure. To deepen your understanding:
Hands-on practice with aperture, shutter speed, and ISO is key to mastering your mirrorless camera.
- Regularly calibrate your lens to ensure accurate aperture readings and sharp images.
- Manage your battery wisely, as frequent adjustments and previews drain power faster.
- Use manual mode to tweak aperture, shutter speed, and ISO in real-time, noting their effects.
- Take notes or keep a shooting log to track what works best in different scenarios, refining your technique over time.
- Understanding the evolving language of the internet can help you find better tutorials and resources online, accelerating your learning process.
Consistent practice helps you develop an intuitive feel. This process improves your control, reduces reliance on auto, and enhances your overall photography skills.
Unlocking Advanced Features on Your Mirrorless Camera for Better Shots
Revealing the advanced features on your mirrorless camera can greatly elevate your photography. Explore settings like focus modes, exposure bracketing, and custom buttons to take control. Enhancing your camera ergonomics by adjusting grips and button placements makes shooting more comfortable, especially during long sessions. Using lens accessories such as filters, lens hoods, and stabilizers can improve image quality and protect your gear. Immerse yourself in menu options to unlock features like zebra stripes for exposure, focus peaking, or interval shooting. These tools give you precision and flexibility, helping you capture better shots in varying conditions. Understanding Free Floating mechanisms can also contribute to smoother camera operation, especially when working with delicate or lightweight equipment. Don’t shy away from experimenting with these settings—mastering them will unlock your camera’s full potential and bring your creative vision to life.
Troubleshooting Common Challenges in Manual Mode
When shooting in manual mode, you might encounter issues like overexposed or underexposed images, blurry focus, or noisy photos. To fix these, you’ll need to adjust your exposure settings, master focus techniques, and manage ISO properly. Let’s explore quick solutions for these common challenges so you can get better results every time. Additionally, understanding camera settings can help you make more precise adjustments tailored to your shooting environment. Being familiar with exposure control enables you to quickly troubleshoot lighting problems and achieve balanced images. Recognizing art care principles can also assist in preserving your photos’ visual integrity over time. Gaining a solid grasp of safety considerations ensures you operate your camera equipment confidently and securely in various conditions. Developing a deeper understanding of manual focus techniques can further improve your sharpness and clarity in challenging shooting scenarios.
Adjust Exposure Settings
Struggling to get the right exposure? Adjusting exposure settings can be tricky, especially if lens compatibility affects your camera’s performance. Here are some tips:
- Check your lens compatibility to ensure your lens can handle the desired aperture and shutter speed.
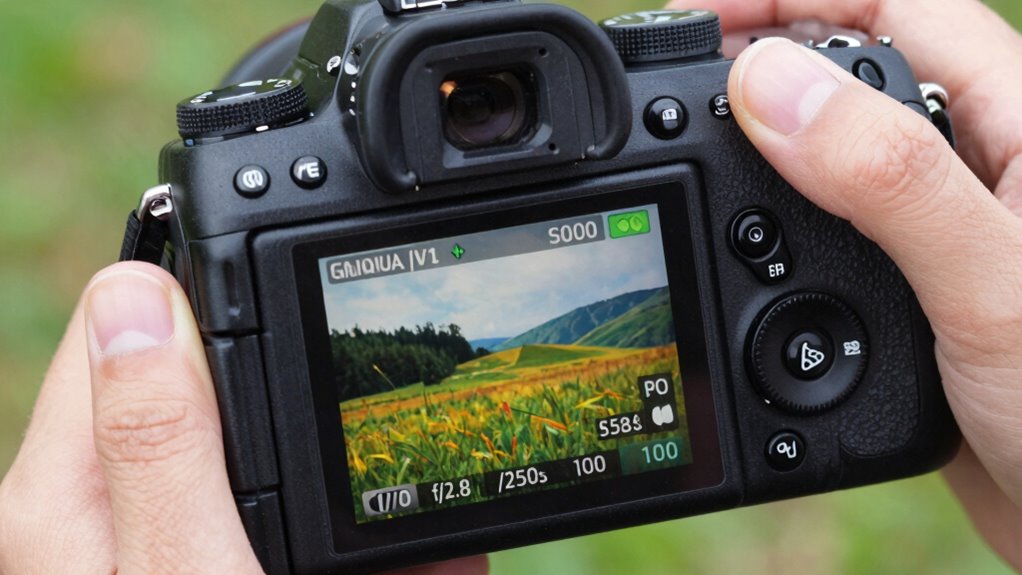
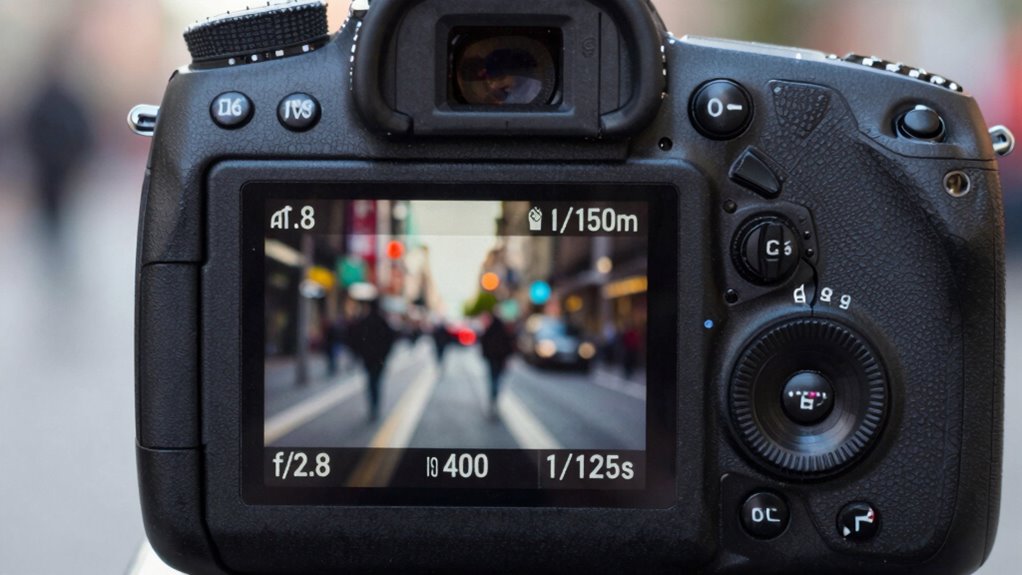
- Use the histogram to gauge whether your image is over- or underexposed.
- Keep an eye on battery life; low power can impact your camera’s responsiveness, affecting exposure adjustments.
- Experiment with ISO, shutter speed, and aperture to find the perfect balance for your scene.
Master Focus Techniques
Mastering focus techniques in manual mode can be challenging, but understanding common issues can help you troubleshoot quickly. Poor camera ergonomics, like uncomfortable grip or awkward button placement, can hinder your ability to achieve sharp focus. Make certain your camera feels comfortable in your hands to maintain steady control. Lens compatibility is also vital; using incompatible lenses may result in focus errors or sluggish responsiveness. Always check your lens specifications and make sure they match your camera body. Fine-tune focus by adjusting focus rings carefully, and use focus peaking or magnification features if available. Practice steady handling and familiarize yourself with your gear to improve focus accuracy. Additionally, understanding your smart home fitness setup can help you maintain a steady, distraction-free environment, which is essential for precise manual focusing. Recognizing the importance of camera settings can further refine your focus techniques and ensure optimal image sharpness. Paying attention to ergonomics and grip can significantly improve your ability to maintain steady control during manual focus adjustments. Properly configuring your camera controls can also streamline your focusing process and reduce errors during critical shots. Being aware of Lens compatibility and ensuring your equipment is optimized can make a substantial difference in achieving accurate focus.
Manage ISO Properly
Properly managing ISO is essential for achieving ideal image quality in manual mode, especially in challenging lighting conditions. Relying solely on auto ISO can cause unwanted ISO noise in your photos, so understanding when to manually adjust it is key. Being aware of backup power options can be helpful if you’re shooting outdoors in remote locations where power sources are limited. Additionally, understanding how ISO interacts with exposure settings allows you to fine-tune your camera for optimal results. 1. Set ISO as low as possible in bright conditions to prevent ISO noise. 2. Use auto ISO when lighting varies, but limit its maximum to avoid excessive noise. 3. Increase ISO cautiously in low light to maintain detail without introducing too much noise. 4. Regularly review images to check for noise, adjusting ISO accordingly for future shots. Balancing ISO helps you avoid grainy photos and keeps your images sharp. Mastering this control ensures you’re never at the mercy of auto settings, giving you cleaner, more professional results.
Why Shooting in Manual Improves Photos for Different Lighting Conditions

Shooting in manual gives you precise control over exposure, so your photos look just right in any lighting. It also lets you adapt quickly to changing conditions, ensuring consistent results. Plus, you have more creative flexibility to shape your images exactly as you envision.
Precise Exposure Control
When you shoot in manual mode, you gain full control over your camera’s exposure settings, which is essential for adapting to changing lighting conditions. This control allows you to optimize dynamic range, capturing details in shadows and highlights without losing information. Precise exposure also enhances your ability to perform accurate color grading, maintaining true colors and tones.
Consider these key points:
- Adjust shutter speed, aperture, and ISO to balance exposure precisely.
- Use the histogram to evaluate exposure accuracy in real-time.
- Fine-tune exposure settings to avoid blown-out highlights or blocked shadows.
- Leverage your camera’s metering to inform your adjustments, ensuring consistent results across different lighting scenarios.
Mastering this control elevates your photography, producing well-exposed images with richer tones and better color fidelity.
Adaptability to Lighting
Since lighting conditions can change quickly, shooting in manual mode lets you adapt on the fly, guaranteeing your photos stay well-exposed regardless of the environment. Adjusting your settings manually gives you control over lighting balance, so your images won’t be overexposed or too dark when lighting shifts. This control also helps maintain color accuracy, preventing color casts or dull tones caused by automatic adjustments. When you take charge of exposure and white balance, you can respond instantly to different lighting scenarios—whether indoors, outdoors, or in mixed lighting. Manual mode empowers you to fine-tune your camera’s settings, maintaining consistent image quality despite changing light conditions. This adaptability ensures your photos are sharp, vibrant, and true to life in any environment.
Creative Image Flexibility
Manual mode unchains your creative potential by giving you full control over exposure settings, allowing you to craft images that match your artistic vision regardless of lighting conditions. When you shoot in manual, you can experiment with advanced lighting techniques, such as adjusting shutter speed for motion blur or aperture for depth of field, to create mood and emphasis. It also enables you to apply composition principles intentionally, like leading lines or framing, without being limited by auto settings. By mastering these elements, you can:
- Perfectly expose high-contrast scenes
- Capture dynamic lighting effects
- Balance shadows and highlights
- Enhance storytelling through deliberate exposure choices
This flexibility empowers you to produce striking photos tailored to your creative goals, regardless of changing light.
Building Your Skills: Practice Exercises to Stop Shooting on Auto
To truly improve your photography skills, it’s essential to practice using your mirrorless camera beyond the automatic settings. Start with exercises that focus on lighting techniques, such as adjusting exposure to see how different lighting impacts your shot. Practice intentionally controlling ISO, shutter speed, and aperture to understand their effects. Next, incorporate composition rules like the rule of thirds, leading lines, and framing to create more compelling images. Challenge yourself to set specific goals for each shot, experimenting with different lighting conditions and angles while applying these rules. By consciously practicing these techniques, you’ll develop your eye for detail and start capturing more intentional, creative photos instead of relying on auto modes.
Benefits of Shooting in Manual for Your Photography Style
Practicing with automatic settings helps you understand basic lighting and composition, but taking control of your camera’s settings unfastens even greater creative potential. Shooting in manual offers precision over exposure, allowing you to craft the mood you envision. It also enables you to:
- Fine-tune sensor calibration for sharper images and consistent color accuracy.
- Optimize battery life by reducing unnecessary camera functions and settings adjustments.
- Experiment with shutter speed and aperture to achieve specific effects, like motion blur or depth of field.
- Develop your unique style by mastering ISO settings, ensuring clarity even in challenging lighting conditions.
Mastering manual mode enhances your overall control, giving you the tools to create intentional, professional-looking images while maintaining efficiency in your workflow.
Frequently Asked Questions
How Do I Choose the Right ISO for Different Scenes?
For scene brightness, you choose the right ISO by adjusting it to match the lighting conditions. Lower ISO values, like 100 or 200, work best in bright scenes, while higher ISO, such as 800 or 1600, helps in low-light situations. You want to keep ISO as low as possible to prevent noise, but raise it when necessary to ensure proper exposure without sacrificing image quality.
What Are the Best Settings for Capturing Fast-Moving Subjects?
To capture fast-moving subjects, set a fast shutter speed, ideally 1/1000s or higher, to freeze motion. Use continuous autofocus modes like AI Servo or AF-C to keep your subject sharp. Switch to burst mode to take multiple shots quickly, increasing your chances of getting a perfect shot. Keep an eye on your shutter speed and autofocus, adjusting as needed based on the speed of your subject and lighting conditions.
How Can I Prevent Overexposure or Underexposure in Manual Mode?
To prevent overexposure or underexposure in manual mode, use histogram analysis to check your exposure levels. Aim for a balanced histogram without spikes on either side. Additionally, try exposure bracketing—taking multiple shots at different settings—so you can select the best exposure later. Adjust your aperture, shutter speed, or ISO based on these tools, ensuring your images are properly exposed every time.
What Accessories Can Enhance Manual Shooting Effectiveness?
You can enhance your manual shooting by investing in a sturdy tripod to guarantee stability during long exposures or low-light shots. Lens filters, like polarizers or ND filters, help control reflections and exposure levels, giving you greater creative control. These accessories improve image quality and consistency, allowing you to focus on composition and exposure adjustments without worrying about camera shake or unwanted light effects.
How Do I Adapt Manual Settings for Low-Light or Night Photography?
Your camera’s night shots can look like starry skies if you tweak manual settings. Use a wide aperture and increase ISO, but keep an eye on noise. Before shooting, do sensor cleaning and lens calibration for clarity. Use longer shutter speeds with a tripod, and manually focus for sharpness. These steps turn low light challenges into stunning images, making your photography as epic as capturing the universe itself.
Conclusion
Don’t let auto mode keep you stuck in the past—your mirrorless camera is a powerful tool waiting to be unleashed. By mastering manual settings, you’ll unlock your creativity and capture images that truly stand out, no more shooting like it’s 2010. Think of yourself as a modern-day Ansel Adams, shaping each shot with intention. So, dive in, practice, and watch your photography transform from mundane to magnificent. The future of your photos is in your hands!